Cantonese · Sweets & Drinks
Snow Skin Mooncakes (冰皮月饼)
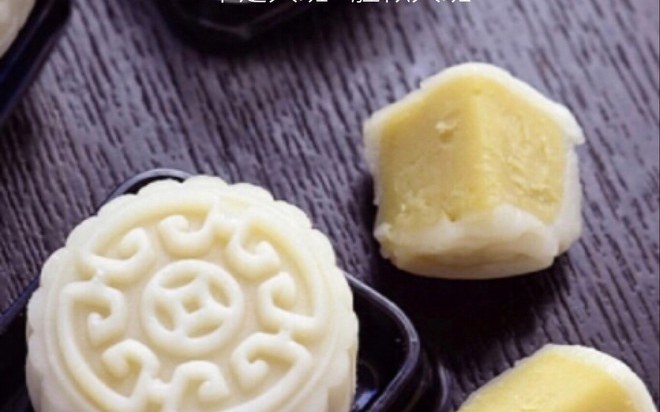
Hong Kong-style no-bake mooncakes: a soft steamed rice-flour skin around sweet mung bean paste, chilled overnight until silky — milkier and easier than baked.
Instructions
-
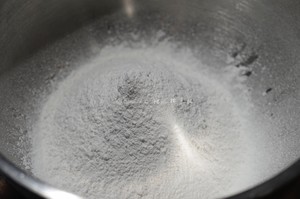 Start at least a day before serving. Sift the glutinous rice flour, rice flour, cake flour and wheat starch into a large bowl, then whisk in the powdered sugar, condensed milk and salt.
-
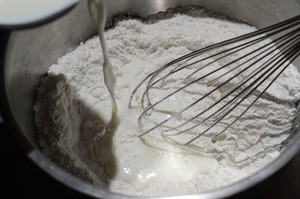 Pour in the milk a little at a time — about a quarter of it first — whisking until smooth before each addition. This gradual mixing is the classic safeguard against a skin of floating oil later: only a smooth, lump-free batter can hold the butter in suspension.
-
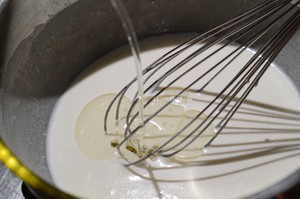 When the batter is even and pourable, stream in the melted butter slowly while whisking steadily. Add the rest of the milk, whisk until fully combined, and check: no butter streaks, no lumps, no layers.
-
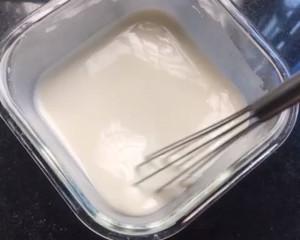 Pour the batter into a wide, shallow heatproof bowl. Cover with a plate or plastic wrap and steam over high heat for 25-30 minutes.
-
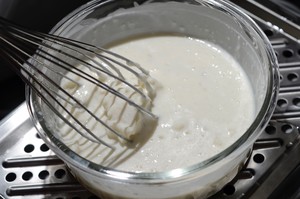 At the 8-minute mark, when the edges have just set, open and stir the batter thoroughly, smooth the top, and keep steaming. Stir once more around 15 minutes — the bowl's edges and bottom set first, and stirring equalizes the heat so every part fully gelatinizes.
-
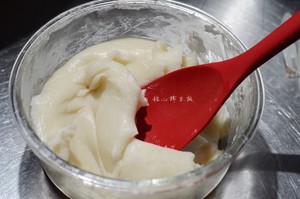 The skin is done when it turns an even, slightly translucent milky white with no chalky white core in the middle; if the center is whiter than the edges, steam 10 minutes more. Taste a pinch — it should be milky and sweet; knead in a spoonful of condensed milk if you want it sweeter.
-
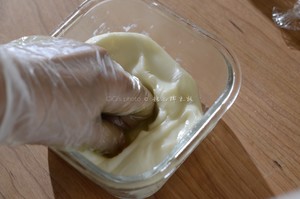 Knead the hot dough with a silicone spatula or dough scraper until even and elastic, then spread it on a flat plate to cool faster. Press plastic wrap directly onto the surface and refrigerate until completely cold, preferably overnight.
-
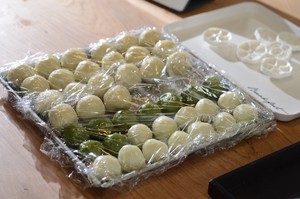 The next day, put on disposable gloves — this dough is eaten as-is, with no baking to sterilize it. Knead the cold dough for a few minutes until soft and stretchy, roll it into a log, wrap, and chill 15 minutes to relax.
-
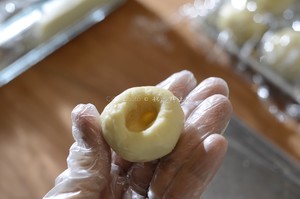 Divide and fill: cut the dough into 20 pieces of 20 g and the filling into 20 pieces of 30 g — the 4:6 skin-to-filling ratio keeps these from tasting doughy. For salted-yolk versions, wrap each 30 g portion of paste around a half yolk. Roll everything into balls and keep them covered with plastic at all times; exposed skin dries and cracks.
-
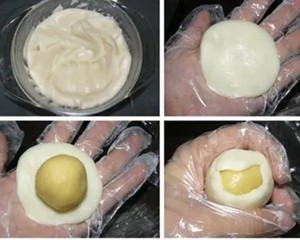 Wrap: flatten a skin ball into a 3-inch (7.5 cm) disc, thinner at the edges than the center. Cup it in one palm, set a filling ball in the middle, and push the skin up around the filling with the thumb and forefinger of your other hand while turning, until fully enclosed. Pinch the seam closed.
-
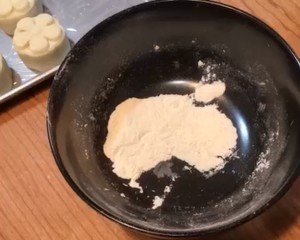 Mold: if the ball feels sticky, roll it lightly in the toasted glutinous flour and brush off every trace of excess — a thick coating dries the skin. Press each ball firmly into a 50 g mooncake mold over a plastic-wrap-lined tray and push out with one even press.
-
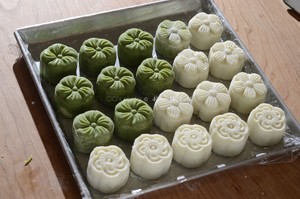 Cover and refrigerate at least 12 hours before eating. Freshly molded snow skin is soft and slightly tacky; after a night of chilling it turns silky, faintly chewy and holds clean patterned edges. Best eaten within 3 days.
Why this recipe works
1. A liquid batter, steamed — not a dough, kneaded. Many snow skin recipes make a dough and knead it raw. This one mixes a pourable batter and steams it, which gelatinizes every starch grain fully and evenly. That is the source of the celebrated texture here: soft and yielding, never rubbery — the author describes it as soft rather than bouncy, which is exactly the old Hong Kong shop style home bakers chase.
2. The emulsion order. Milk goes in gradually so the batter is always smooth before more liquid arrives, and only then does the melted butter stream in. When that order is respected, the fat binds into the starch paste instead of floating off in beads during steaming — the single most common snow skin failure.
3. Fixed ratios and a long chill. Twenty grams of skin to thirty of filling keeps every bite filling-forward; thicker skins taste doughy. And the 12-hour refrigeration is part of the recipe, not a suggestion: freshly steamed glutinous dough is tacky and loose, and it only sets into that clean, sliceable, faintly chewy skin after a night in the cold. That chill is also the difference in the snow skin mooncake vs baked mooncake divide: one is served cold and soft, the other warm-shelled and golden.
About the dish
Snow skin mooncakes are the modern, no-bake cousin of the classic baked mooncake. Instead of a kneaded, syrup-brushed pastry baked golden, the skin is a steamed glutinous rice dough kept chilled from start to finish — hence the name, which literally means "ice skin." They are a young tradition: Hong Kong bakeries popularized them in the late 20th century, and the story goes that the soft, non-bouncy skin sold by one famous bakery chain became the benchmark every home recipe chases. This recipe is exactly that pursuit — its title cheerfully admits it is "not the shop's" — with cake flour and condensed milk folded into the classic glutinous-rice blend for extra softness and a milky sweetness. Fill them however you like; the author suggests mung bean or lotus paste, and adds that homemade filling is what elevates a good snow skin mooncake to a great one.
What to serve with it
Snow skin mooncakes are served cold, sliced into wedges with hot tea to balance the chill — take them straight from the fridge, they are best well chilled. One or two per person is the classic Mid-Autumn portion. For more festival sweets and everyday bakes, browse our desserts collection, and the basics page has the foundational fillings and doughs worth mastering first.
Pro tips
- Make your own toasted glutinous flour: spread ¼ cup raw glutinous rice flour in a dry skillet and stir over low heat for 5 minutes until it smells nutty and turns barely cream-colored. Do not let it brown.
- The gradual milk addition is not fussiness — milk added all at once can leave the batter unable to emulsify, and the butter will float out during steaming in greasy beads.
- Stirring twice during steaming is what separates a uniform, bouncy skin from one with raw-flour lumps hiding in the middle.
- Keep everything under plastic wrap: snow skin dries to a crackly crust within 10 minutes in open air.
- Weigh, do not eyeball. Snow skin is an assembly of fixed ratios — 20 g skin to 30 g filling — and even 5 g off changes how the mold releases.
- Knead a spoonful of matcha, cocoa or freeze-dried fruit powder into a portion of dough for colored skins — a classic Mid-Autumn trick.
Storage & leftovers
- Store in a sealed container in the refrigerator for 3-5 days; without preservatives the skin slowly firms up, so eat within 3 days for the best texture.
- Keep them sealed at all times — exposed snow skin dries and cracks within hours.
- Freeze for up to 1 month (see FAQ); thaw in the refrigerator overnight.
Frequently asked questions
Why is my snow skin oily and streaky after steaming?
The butter was added before the batter was smooth, or the milk went in all at once. The fix is order: smooth, lump-free batter first, then butter in a slow stream while whisking. A batter with visible oil beads will separate in the steamer.
Can I use a different filling?
Any smooth, stiff paste works: lotus seed, red bean, even taro. Keep it around 30 g per mooncake and on the stiff side — loose fillings squeeze out under the mold. Fresh fruit and soft custards need stabilizing or they weep.
I don't have a mooncake mold. What can I do?
Roll the filled balls in toasted coconut or toasted glutinous flour and call them snowballs, or press a fork crosshatch on top. A small cookie stamp — or even a measuring cup pressed gently — works in a pinch.
Why wait 12 hours before eating?
Snow skin mooncakes are eaten without baking, so the steamed skin needs time to chill and set. Right after molding it is soft and sticky, and the flavors have not melded; after 12 hours the skin is silky and the whole mooncake tastes rounded.
Can I freeze snow skin mooncakes?
Yes, up to 1 month, well-sealed. Thaw overnight in the refrigerator — never at room temperature, where condensation makes the skin sticky. The texture is marginally firmer after freezing.
What is kao fen and can I substitute it?
Kao fen is glutinous rice flour dry-toasted until faintly nutty — the dusting flour that keeps the sticky skin from bonding to your gloves, mold and knife. This recipe makes it in 5 minutes in a dry skillet; in a pinch, cornstarch also prevents sticking, though it lacks the nutty note.
How long do snow skin mooncakes keep?
Sealed in the refrigerator, 3–5 days — but without preservatives the skin slowly firms, so eat within 3 days for the best soft-chewy bite. Keep them sealed at all times: exposed skin dries and cracks.